प्रारंभिक सारांश (Opening Summary)
UP Scholarship Form Fill Up Online 2026-27 के लिए ऑनलाइन फॉर्म scholarship.up.gov.in पोर्टल पर जुलाई से भरे जा सकते हैं। यह गाइड आपको वन टाइम रजिस्ट्रेशन (OTR) से लेकर कॉलेज वेरिफिकेशन (College Verification) तक की पूरी प्रक्रिया समझाती है। यहाँ बताए गए चरणों, आवश्यक दस्तावेज़ों और आम गलतियों का ध्यान रखने से आवेदन निरस्त (Reject) होने की संभावना बहुत कम हो जाती है। सबसे पहले समझते हैं कि फॉर्म भरने से पहले क्या करना ज़रूरी है।
वन टाइम रजिस्ट्रेशन (OTR) – अनिवार्य पहला चरण
OTR के बिना आप फ्रेश (Fresh) या रिन्यूअल (Renewal) आवेदन जमा नहीं कर सकते। यह एक बार पंजीकरण करने की प्रक्रिया है जिसका उपयोग हर साल होता है।
OTR क्या है और यह क्यों महत्वपूर्ण है?
OTR का मतलब One Time Registration है। इसमें आपका मोबाइल नंबर, ईमेल आईडी और बुनियादी व्यक्तिगत विवरण पोर्टल पर सेव हो जाते हैं। अगर आपने पिछले साल OTR नहीं किया है, तो नया करना होगा। यदि पहले से किया हुआ है, तो उसी लॉगिन क्रेडेंशियल का उपयोग करें—दोबारा पंजीकरण करने की आवश्यकता नहीं है।
-
OTR न करने का परिणाम: जो छात्र बिना OTR किए सीधे “Fresh Registration” पर क्लिक करते हैं, पोर्टल उन्हें “No OTR found” का एरर दिखाता है। ऐसी स्थिति में आगे फॉर्म नहीं भरा जा सकता।
UP पोर्टल पर OTR पूरा करने के चरण:
-
scholarship.up.gov.in पर जाएं।
-
“Student” सेक्शन में “New Registration” पर क्लिक करें।
-
मोबाइल नंबर और ईमेल दर्ज करें—प्राप्त OTP को सत्यापित (Verify) करें।
-
छात्र का नाम (जैसा 10वीं की मार्कशीट में है), जन्मतिथि (DOB) और माता-पिता का नाम दर्ज करें।
-
सबमिट करने के बाद एक रजिस्ट्रेशन आईडी (Registration ID) जनरेट होगी—इसे सुरक्षित रख लें।
व्यावहारिक प्रभाव: OTR के बाद ही आप “Fresh Application” या “Renewal” का विकल्प देख पाएंगे। बिना OTR के आगे की प्रक्रिया संभव नहीं है।
पात्रता मापदंड (Eligibility Criteria)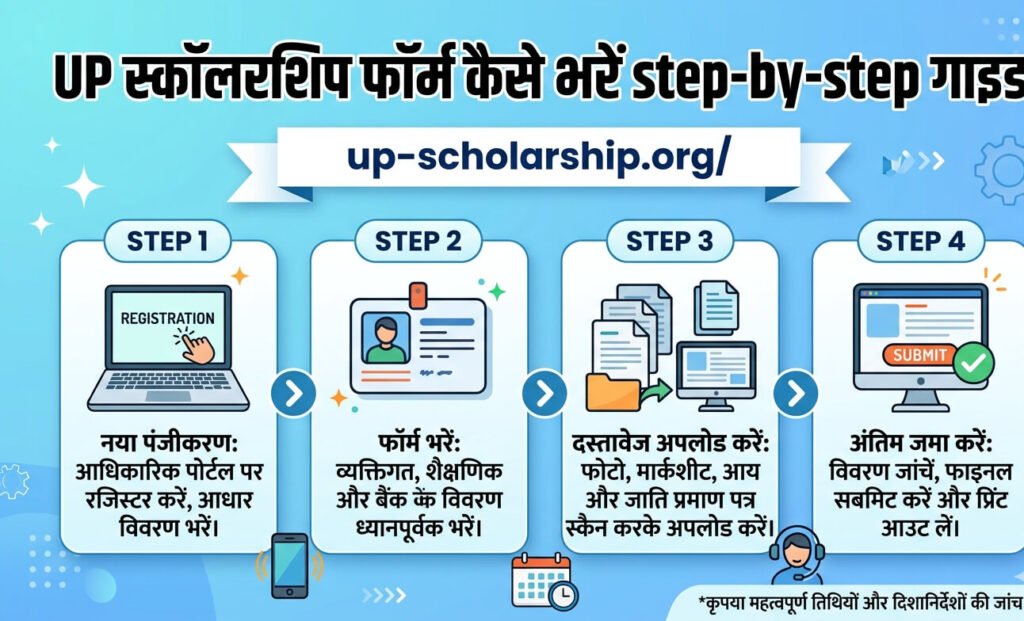
छात्रवृत्ति के लिए श्रेणी-वार आय सीमा (Income Limit) और शैक्षणिक योग्यता दोनों महत्वपूर्ण हैं। नीचे दी गई तालिका से स्पष्ट समझें कि कौन आवेदन कर सकता है।
श्रेणी-वार आय सीमा (Income Limits)
| श्रेणी | प्री-मैट्रिक (कक्षा 9-10) | पोस्ट-मैट्रिक (कक्षा 11 से PG) |
| SC / ST | ₹2.5 लाख प्रति वर्ष | ₹2.5 लाख प्रति वर्ष |
| OBC (नॉन-क्रीमी लेयर) | ₹2.5 लाख प्रति वर्ष | ₹2.5 लाख प्रति वर्ष |
| सामान्य (EWS) | ₹1 लाख प्रति वर्ष | ₹2 लाख प्रति वर्ष |
| अल्पसंख्यक (Minority) | ₹2 लाख प्रति वर्ष | ₹2 लाख प्रति वर्ष |
शैक्षणिक योग्यताएं
कक्षा 9 से लेकर PG तक के छात्र आवेदन कर सकते हैं। पिछली कक्षा में न्यूनतम 50% अंक होना अनिवार्य है (कुछ श्रेणियों के लिए 40% भी मान्य है)। संशोधन के अनुसार मैनेजमेंट कोटा (Management Quota) या स्पॉट एडमिशन (Spot Admission) से प्रवेश लेने वाले छात्र इसके पात्र नहीं हैं।
ध्यान दें: क्या आपने जांच की है कि आपका प्रवेश पारदर्शी और मान्यता प्राप्त प्रक्रिया से हुआ है या नहीं?
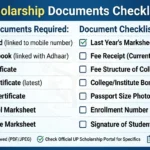
आवश्यक दस्तावेज़ – पूरी चेकलिस्ट (Required Documents)
दस्तावेज़ अपलोड करते समय प्रारूप (Format) और साइज़ दोनों महत्वपूर्ण हैं। गलत दस्तावेज़ अपलोड होने से आवेदन डिफेक्टिव (Defective) मार्क हो जाता है।
| दस्तावेज़ | विवरण / मापदंड |
| आधार कार्ड | आगे और पीछे दोनों तरफ। (साइज़: 50KB से 300KB) |
| मूल निवास प्रमाण पत्र | उत्तर प्रदेश का होना चाहिए, जो तहसीलदार द्वारा जारी किया गया हो। |
| आय प्रमाण पत्र | वर्तमान वित्तीय वर्ष (2026-27) का। पुराना प्रमाण पत्र निरस्त कर दिया जाएगा। |
| जाति प्रमाण पत्र | SC/ST/OBC श्रेणियों के लिए सक्षम अधिकारी द्वारा जारी। |
| पिछली कक्षा की मार्कशीट | अंतिम उत्तीर्ण कक्षा की अंकतालिका (उदा: कक्षा 10 के लिए कक्षा 9 की मार्कशीट)। |
| बैंक पासबुक | पहले पेज की कॉपी (अकाउंट नंबर, IFSC कोड और नाम के साथ)। आधार से लिंक होना अनिवार्य। |
| पासपोर्ट साइज़ फोटो | 10KB से 50KB, JPG/JPEG प्रारूप (200×230 पिक्सल अनुशंसित)। |
| हस्ताक्षर (Signature) | 10KB से 20KB, JPG/JPEG प्रारूप। |
-
दस्तावेज़ न होने का परिणाम: अपलोड के समय दस्तावेज़ न होने पर आप आगे नहीं बढ़ सकते। बाद में सुधार का मौका केवल करेक्शन विंडो (Correction Window) में ही मिलता है।
दस्तावेज़ कहाँ से बनवाएं?
आय और जाति प्रमाण पत्र के लिए e-District पोर्टल (edistrict.up.gov.in) का उपयोग करें या अपनी तहसील जाएं। इस प्रक्रिया में 7-10 दिनों का समय लगता है।
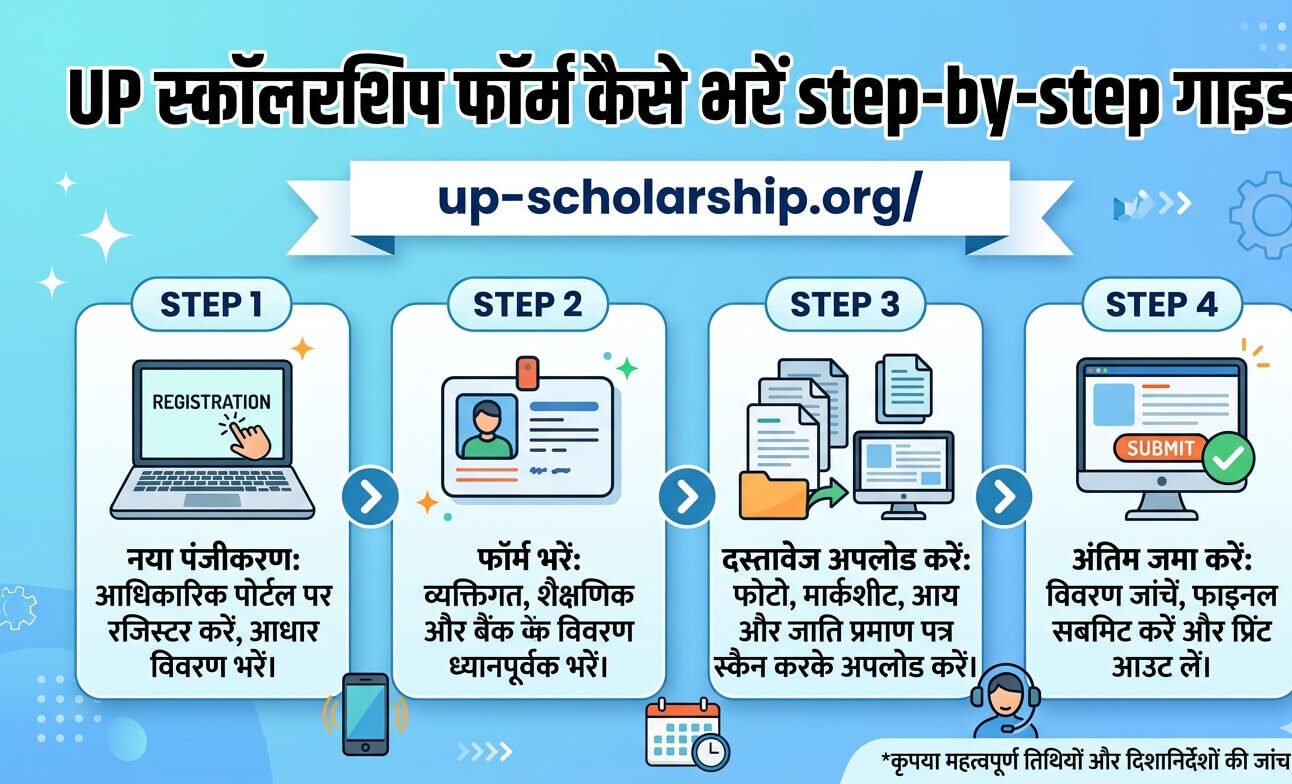
स्टेप-बाय-स्टेप फॉर्म भरने की प्रक्रिया (Step-by-Step Form Fill Process)
चरण 1 – आधिकारिक पोर्टल पर जाएं और विकल्प चुनें
scholarship.up.gov.in पर जाएं और “Student Login” पर क्लिक करें। OTR के बाद आपको “Fresh Application” और “Renewal Application” के विकल्प दिखेंगे।
-
जो छात्र पहली बार आवेदन कर रहे हैं, वे Fresh चुनें।
-
जिन्हें पिछले साल भी छात्रवृत्ति मिली थी, वे Renewal चुनें।
आम गलती: कई छात्र “Renewal” की जगह “Fresh” चुन लेते हैं। इससे उनकी पुरानी आवेदन हिस्ट्री डिलीट हो जाती है और नए सिरे से प्रक्रिया शुरू करनी पड़ती है।
चरण 2 – व्यक्तिगत विवरण भरें
यहाँ छात्र का नाम बिल्कुल वैसा ही दर्ज करें जैसा 10वीं की मार्कशीट में है। जन्मतिथि, माता-पिता का नाम और आधार नंबर दर्ज करें। आधार नंबर डालते ही प्राप्त OTP से सत्यापन करें।
चरण 3 – शैक्षणिक विवरण भरें
वर्तमान कक्षा, बोर्ड का नाम (UP Board / CBSE / ICSE), पिछले वर्ष के अंक और नामांकन संख्या (Enrollment Number) दर्ज करें।
गलत एनरोलमेंट नंबर का परिणाम: यदि नामांकन संख्या गलत है, तो कॉलेज वेरिफिकेशन के समय सिस्टम डेटा मैच नहीं करेगा और आवेदन “Defective” मार्क हो जाएगा।
चरण 4 – दस्तावेज़ अपलोड करें
एक-एक करके सभी दस्तावेज़ अपलोड करें। फोटो और सिग्नेचर का साइज़ पहले ही चेक कर लें।
व्यावहारिक सुझाव: यदि फोटो अपलोड नहीं हो पा रही है, तो फाइल के नाम से स्पेस हटा दें। उदाहरण के लिए,
photo_student_name.jpgके बजायphoto.jpgनाम रखें।
चरण 5 – फाइनल सबमिट से पहले पूर्वावलोकन (Preview)
सबमिट करने से पहले “Preview” विकल्प पर क्लिक करके सभी विवरणों की जांच कर लें।
चरण 6 – फाइनल सबमिट करें और आवेदन संख्या सेव करें
सबमिट पर क्लिक करने के बाद आवेदन संख्या (Application Number) जनरेट होगी। इसे तुरंत सेव करें और प्रिंट निकालकर 4 प्रतियां (Copies) अपने पास रखें (एक कॉलेज के लिए, एक स्वयं के लिए, एक बैंक के लिए और एक बैकअप)।
फॉर्म जमा करने के बाद – कॉलेज वेरिफिकेशन (College Verification)
ऑनलाइन फॉर्म सबमिट करने के 24 घंटे के अंदर प्रिंटआउट निकालकर अपने कॉलेज के प्रधानाचार्य या नोडल अधिकारी को जमा करें। कॉलेज प्रशासन अपने पोर्टल पर लॉगिन करके सत्यापित करता है कि आप एक मान्य छात्र हैं।
-
देरी का परिणाम: यदि आपने प्रिंटआउट कॉलेज में समय पर (7 दिनों के भीतर) जमा नहीं किया, तो वेरिफिकेशन नहीं होगा। बिना कॉलेज वेरिफिकेशन के छात्रवृत्ति स्वीकृत नहीं होती है।
-
यदि कॉलेज देरी करे: तो प्रधानाचार्य से व्यक्तिगत रूप से मिलें। फिर भी समाधान न होने पर जिला समाज कल्याण अधिकारी (District Social Welfare Office) से संपर्क करें।
आम गलतियां और उनके सुधार (Common Mistakes and Fixes)
| गलती | कारण | सुधार / समाधान |
| “No OTR found” एरर | बिना OTR के फ्रेश रजिस्ट्रेशन पर क्लिक करना | पहले OTR पूरा करें, फिर लॉगिन करें |
| फोटो अपलोड फेल | फाइल साइज़ अधिक होना या गलत फॉर्मेट | फोटो कंप्रेस करें, JPG फॉर्मेट में बदलें |
| अमान्य आय प्रमाण पत्र | पुराना प्रमाण पत्र अपलोड करना | वित्तीय वर्ष 2026-27 का नया प्रमाण पत्र बनवाएं |
| ड्रॉपडाउन में कॉलेज न मिलना | गलत जिला चुनना या कॉलेज संबद्ध न होना | अपना सही जिला चुनें, फिर खोजें |
| आय सीमा के कारण निरस्त | फॉर्म में गलत आय राशि भरना | आय सीमा तालिका जांचें और पुनः आवेदन करें |
फ्रेश बनाम रिन्यूअल आवेदन (Fresh vs Renewal Comparison)
| पैरामीटर | फ्रेश एप्लीकेशन (Fresh) | रिन्यूअल एप्लीकेशन (Renewal) |
| कौन लागू कर सकता है? | पहली बार आवेदन करने वाले | जिन्हें पिछले वर्ष छात्रवृत्ति मिली |
| OTR आवश्यक? | हाँ | हाँ (वही लॉगिन) |
| पिछली मार्कशीट? | आवश्यक नहीं | आवश्यक |
| पुराना आवेदन नंबर? | आवश्यक नहीं | आवश्यक (पिछले वर्ष का) |
| समय | 15-20 मिनट | 10-15 मिनट |
| कॉलेज वेरिफिकेशन? | हाँ | हाँ (लेकिन तेज़ प्रक्रिया) |
अक्सर पूछे जाने वाले प्रश्न (FAQs)
1. क्या मोबाइल से फॉर्म भर सकते हैं?
हाँ, लेकिन Chrome ब्राउज़र में “Desktop Site” मोड चालू रखें ताकि सिग्नेचर अपलोड में समस्या न आए।
2. फॉर्म सबमिट करने के बाद संशोधन (Edit) कैसे करें?
करेक्शन विंडो के समय पोर्टल पर जाकर विवरण अपडेट कर सकते हैं (आमतौर पर फरवरी के महीने में खुलती है)।
3. छात्रवृत्ति का पैसा कब आता है?
कॉलेज वेरिफिकेशन और विभागीय स्वीकृति के बाद DBT के माध्यम से राशि सीधे बैंक खाते में भेजी जाती है।
4. क्या प्राइवेट कॉलेज के छात्र पात्र हैं?
हाँ, यदि कॉलेज UP सरकार से संबद्ध है और प्रवेश पारदर्शी प्रक्रिया से हुआ है (मैनेजमेंट कोटा वाले पात्र नहीं हैं)।
5. आय प्रमाण पत्र कहाँ से बनवाएं?
तहसील कार्यालय या e-District पोर्टल (edistrict.up.gov.in) से बनवा सकते हैं। ऑनलाइन बनने में 7-10 दिन लगते हैं।
6. अगर आधार नंबर गलत डाल दिया तो?
करेक्शन विंडो के समय इसे सुधारा जा सकता है। विंडो बंद होने पर अगले सत्र का इंतजार करना होगा।
7. क्या सामान्य (General) श्रेणी के छात्रों को छात्रवृत्ति मिलती है?
हाँ, EWS श्रेणी के तहत आय सीमा नियम लागू होते हैं।
8. “Defective” स्टेटस का क्या मतलब है?
इसका अर्थ है कि आपके दस्तावेज़ या विवरण में कोई कमी पाई गई है। इसे करेक्शन विंडो में पुनः अपलोड करें।
9. क्या बिना आधार के फॉर्म भरा जा सकता है?
नहीं, आधार कार्ड अनिवार्य है।
10. हेल्पलाइन नंबर क्या है?
UP Scholarship टोल-फ्री हेल्पलाइन नंबर: 1800-180-0009 (कार्यालयीन समय में)।
लेखक की विशेषज्ञता (Author Expertise)
यह गाइड UP Scholarship पोर्टल के आधिकारिक दिशानिर्देशों, सरकारी अधिसूचनाओं और समाज कल्याण विभाग के डेटा विश्लेषण पर आधारित है। (स्रोत: scholarship.up.gov.in)
सबमिशन से पहले अंतिम चेकलिस्ट (Final Checklist)
-
[ ] OTR रजिस्ट्रेशन पूरा कर लिया है?
-
[ ] आय प्रमाण पत्र वर्तमान वर्ष (2026-27) का है?
-
[ ] फोटो और हस्ताक्षर का साइज़ नियम अनुसार है?
-
[ ] बैंक खाता आधार से लिंक है?
-
[ ] आवेदन का प्रिंटआउट कॉलेज में जमा कर दिया है?